
Cryptocurrency can feel like entering a new world. Understanding new terms, wallets, and different blockchains can be difficult. But if you’re here, you’re ready to explore the crypto world and curious about MetaMask and Arbitrum.
As Ethereum Layer 2 networks like Arbitrum have continued to grow in 2026, with billions in total value locked, more users than ever are bridging from the Ethereum mainnet to L2s for cheaper and faster transactions.
Let’s break it down together! MetaMask is a wallet that allows you to store your cryptocurrency and interact with the blockchain. It is one of the most popular wallets. The good reason? It is simple and secure, and you will have full control over your funds.
But there is a twist. Ethereum is great, but it can be slow and pricey. This is where Arbitrum comes in. Arbitrum is a Layer 2 solution on top of Ethereum that offers faster transactions and much lower fees. Sounds easier? And it is way cheaper to send your tokens around the blockchain.
The cool part? You can easily bridge assets from Ethereum to Arbitrum by using the Arbitrum Bridge. Now you can move your funds to Arbitrum and then send them back to Ethereum whenever you need. This guide will walk you through how to add money to MetaMask.
If you want to explore the Arbitrum network, we can help you with that. So please grab a cup of coffee, relax, and let’s get started!
What is MetaMask?

Let’s understand. What is MetaMask? You might have heard about it already, or maybe you are just now discovering it. In both cases, it is the wallet that will help you manage your crypto assets.
MetaMask is a software wallet. It is an application that stores your cryptocurrency securely. Basically, it works as an extension in your web browser, and you can download it as an app on your phone.
What makes it special? You can store Ethereum-based tokens and interact directly with decentralized apps (dApps). You are not just using it to send or receive crypto. You can also use it to explore things like decentralized finance (DeFi), NFTs, and much more.
What Are Bridges?
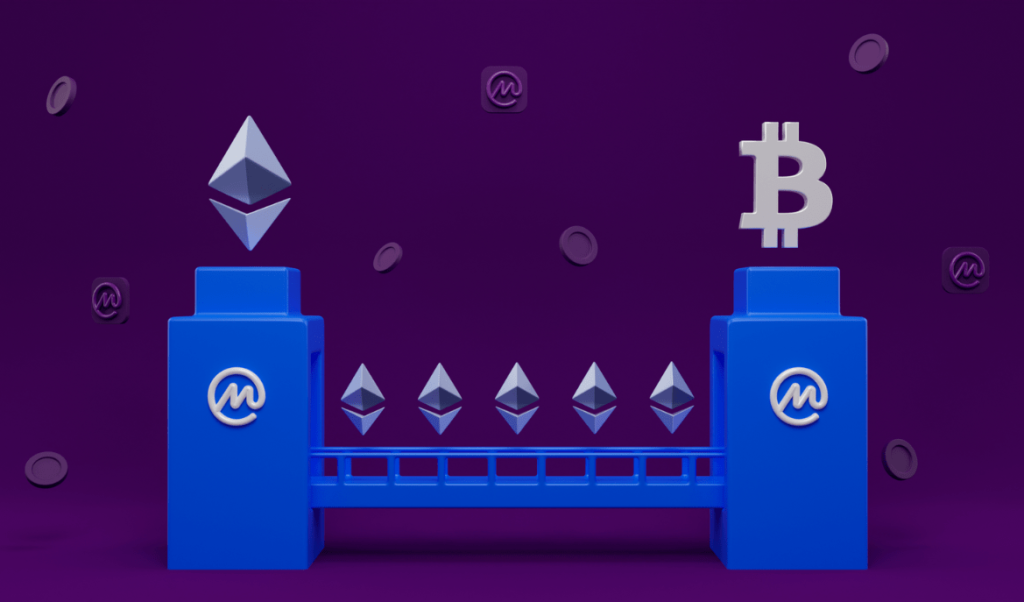
In the world of crypto, bridges are making connections. They let you move assets (like your tokens) from one blockchain to another. Without these bridges, you can’t move your assets off their original networks, so you can’t use them elsewhere.
So, let’s say you have ETH on the Ethereum network. What if you want to use it on a faster and cheaper network like Arbitrum? That is where a blockchain bridge comes in. A bridge will let you transfer your tokens from Ethereum to Arbitrum. Do not worry about security. It is all safe!
Most bridges charge between 0.01% and 0.15% of the bridged amount, depending on the platform and the route you choose. Some will let you transfer for a flat fee that can be as low as a few cents. It is a simple way to move assets across different chains and enjoy the benefits of each network.
Why Arbitrum?
Now, you might be wondering why you chose Arbitrum when Ethereum is working fine. Well, Ethereum is perfectly fine, but it can get pretty pricey. If you have tried using Ethereum recently, you have probably noticed the high fees occasionally. It is not worth transacting at all.
That is where Arbitrum comes in. It is a Layer 2 scaling solution for Ethereum. You can move your assets out of Ethereum to enjoy lower fees and faster processing times. Perfect! So, you can enjoy the security benefits of Ethereum and the speed of Arbitrum.
Popular Bridges to deposit ETH or ERC-20 tokens
Now, we will look into a few bridges you can use to move your assets to Arbitrum. They all serve the same purpose. It is easier for you to get your tokens onto Arbitrum. But some are more popular or user-friendly than others. Here are a few suggestions of bridges that many people use:
Arbitrum Bridge: An official bridge provided by Arbitrum itself. It is excellent for moving ETH and other Ethereum-based tokens. It is pretty easy to use and connects directly with MetaMask. The platform supports the most popular Web3 wallets. You can transfer ETH between Arbitrum One and Arbitrum Nova.
Stargate Token Bridge: Here is another option. Stargate is an excellent bridge that now supports 15+ different networks across both EVM and non-EVM chains. It features a fee of around 0.06% for most transfers. It lets you send dozens of tokens to Arbitrum and other supported networks. It is known for being fast and low-cost and supports many different types of tokens.
Across Protocol: Another excellent choice for bridging assets between the Ethereum mainnet, Arbitrum, Optimism, and Polygon. It works especially well for Ethereum and Ethereum-based L2s. It is designed to be simple and quick. The best part? It focuses on low fees and offers slippage-free transfers. Across has maintained a strong security record with zero major exploits to date.
Portal Bridge: This is a very popular bridge powered by Wormhole. It currently supports 30+ blockchains, including Arbitrum. The cross-chain protocol makes it easier to transfer assets between popular chains.
How to Add Money to MetaMask
Now that we have covered the basics, it is time to set up your wallet and add funds. Here is how you can do it step by step:
Step 1: Install MetaMask
You must install MetaMask on your browser or mobile device to get started. If you are using a desktop, you can go to the MetaMask website. MetaMask currently supports Chrome, Firefox, Brave, Microsoft Edge, and Opera. Download the extension for your preferred browser and follow the instructions to install it.
If you prefer to use your phone, search for MetaMask in the App Store (iOS) or Google Play (Android) and download it. Once you have installed it, open the app and click on “Create a Wallet.”
During your setup process, you will be given a 12-word recovery phrase. Write it down somewhere safe. This is the only way to recover your wallet if your device is damaged.
Step 2: Add Funds to Your MetaMask Wallet
You can now add funds to MetaMask. Here are a few ways you can do that:
Buy Crypto Directly in MetaMask: MetaMask has partnered with trusted third-party providers to let you buy Ethereum and other cryptocurrencies straight from the app. Current active partners include MoonPay, Transak, and Banxa. Note that Transak signed an exclusive partnership with MetaMask in late 2025 and now powers stablecoin onramping through MetaMask’s Deposit button. You can use your debit or credit card to purchase crypto, which will be deposited into your MetaMask wallet.
Transfer Crypto from Another Wallet or Exchange: If you already own some cryptocurrency, you can transfer it to MetaMask by copying your MetaMask wallet address. You will find it at the top of your wallet. Now go to the wallet or exchange you are sending from and paste that address into the withdrawal field.
Withdraw from an Exchange: Another easy way to add funds is to withdraw crypto from an exchange like Coinbase, Binance, or Kraken. Just select Ethereum or another token, paste your MetaMask address, and complete the transaction.
Security tip: For larger amounts, consider connecting a hardware wallet like Ledger or Trezor to MetaMask. This keeps your private keys offline and adds a critical layer of security for serious holders.
How to Add Arbitrum to MetaMask
Now that you have learned how to add money to your MetaMask wallet, let’s get Arbitrum set up easily. You will need to add Arbitrum as a network in MetaMask, and here is how you will do it:
Step 1: Open MetaMask and Access the Network Settings
Go to your MetaMask wallet. Click on the network dropdown at the top. Here, you will find some options. By default, it will say Ethereum Mainnet.
Step 2: Add the Arbitrum Network
To connect to Arbitrum, click on “Add Network.” A new window will pop up asking for some details. As of recent MetaMask versions, Arbitrum One can often be added with a single click from the MetaMask Networks tab without manual entry. If that option is available in your version, use it to save time. If you need to enter the details manually, here is what to fill in:
- Network Name: Arbitrum One
- New RPC URL: https://arb1.arbitrum.io/rpc
- Chain ID: 42161
- Currency Symbol: ETH
- Block Explorer URL: https://arbiscan.io/
Fill in these details and click on Save. Now, click on the network dropdown in MetaMask. You will see Arbitrum as an option. You can easily switch between Ethereum and Arbitrum whenever you need to.
Using the Arbitrum Bridge
Once Arbitrum is set up in MetaMask, it is time to transfer your funds. The Arbitrum Bridge allows you to send your ETH or any supported ERC-20 token between the two networks. Arbitrum One remains the more dominant network in 2026, as it hosts the majority of major DeFi protocols. Arbitrum Nova is designed more for gaming and social apps, so for most DeFi and token-related activity, Arbitrum One is the right choice. Here is how you can use it:
Step 1: Visit the Arbitrum Bridge Website
Go to the official Arbitrum Bridge website. Connect your MetaMask wallet by clicking the “Connect Wallet” button and selecting MetaMask.
Step 2: Select the Token and Amount
After your wallet is connected, you will see options to transfer ETH or other tokens from Ethereum to Arbitrum. Choose the token you want to transfer and enter the amount.
Step 3: Confirm the Transaction
MetaMask will pop up and ask you to confirm the transaction. You need to pay a small gas fee on Ethereum. After you confirm, your assets will be transferred to Arbitrum and ready for use.
Step 4: Confirm Receipt
You will get an interface showing the progress of the cross-chain transfer. You must confirm that you received your assets in the destination wallet. To do this, switch your network in MetaMask to Arbitrum and check your balance. You can also search for your address on Arbiscan if you want to see a full balance breakdown.
How To Bridge to Arbitrum Using Portal Bridge
Bridging your tokens to Arbitrum has never been easier thanks to Portal Bridge. It is fast, simple, and supports many tokens. If you want to test bridges first without using real funds, the Arbitrum Sepolia faucet provides free testnet ETH that mirrors the mainnet experience but with no real value at stake. This is a smart way to practice before moving real money. Here is the step-by-step guide:
Step 1: Connect Your Wallet
Visit the Portal Bridge website and click on “Connect Wallet.” Choose MetaMask or any supported wallet. Make sure your wallet is set to the network where your tokens are located (for example, Ethereum if you are transferring ETH).
Step 2: Select Your Token and Amount
After connecting your wallet, pick the token you want to bridge. It could be ETH or another ERC-20 token. Enter the amount you would like to transfer. Double-check that you have enough for gas fees. The Portal Bridge is usually low-cost.
Step 3: Choose Arbitrum as the Destination
Select Arbitrum as your destination network. This tells Portal Bridge where to send your tokens. Choosing Arbitrum lets you enjoy its fast and cheap transactions.
Step 4: Review and Confirm the Transfer
Check the transfer details carefully, including the token, amount, and destination. If everything looks good, confirm the transaction. You will be prompted to approve it in your MetaMask wallet. Watch for any gas fees and confirm when you are ready.
Step 5: Wait for the Transfer to Complete
Once you have confirmed, you are done! Portal Bridge will send your tokens to Arbitrum. It usually takes a few seconds to a couple of minutes. You can track the transfer status on the platform or use Arbitrum Scan.
Step 6: Check Your Tokens on Arbitrum
After your transfer is complete, your tokens will appear in your Arbitrum wallet. You can now use them for transactions, interact with dApps, and save on gas fees.
How To Bridge to Arbitrum Using Stargate Token Bridge
Let’s dive into how you can bridge assets to Arbitrum using Stargate Token Bridge. It is fast and simple and supports a wide range of tokens across 15+ chains. You get a low fee of around 0.06% with less slippage. Here is how you can use it:
Step 1: Connect Your Wallet
First, visit the Stargate Token Bridge website. Once you are there, click on Connect Wallet and select MetaMask. Make sure your wallet is on the Ethereum network (or whatever network your tokens are on).
Step 2: Choose Your Token and Amount
After you have connected your wallet, select the token you want to bridge. It could be ETH or another ERC-20 token. Enter the amount of the token you would like to move over to Arbitrum. Stargate will show you the amount you will receive on Arbitrum.
Step 3: Select Arbitrum as Your Destination
Now choose Arbitrum as your destination network. Stargate supports multiple blockchains, so make sure to pick Arbitrum so your tokens are sent to the right place.
Step 4: Confirm the Transfer
You will be asked to confirm the transaction in your MetaMask wallet. The transfer will incur a small gas fee, which is usually much cheaper than on Ethereum’s mainnet. Once you approve, your tokens will be sent to Arbitrum.
Step 5: Track Your Transfer
Once your transfer is complete, you can check on Arbitrum to see if your assets have arrived. You can also use Arbitrum Scan to track your transaction and confirm that everything went smoothly.
How To Bridge to Arbitrum Using Across Protocol
Another excellent option for bridging assets to Arbitrum is Across Protocol. It is designed for fast and low-cost transfers and has a strong security record. Here is how you can bridge to Arbitrum with Across Protocol:
Step 1: Go to the Across Protocol Website
Go to the Across Protocol website and click “Connect Wallet.” Choose MetaMask to connect your wallet.
Step 2: Select Your Token and Amount
Once your wallet is connected, choose the token you want to bridge. Whether your assets are in ETH, USDT, or another ERC-20 token, enter the amount you wish to send to Arbitrum.
Step 3: Choose Arbitrum as the Destination Network
Select Arbitrum as your destination network. Across Protocol will then show you the number of tokens you will receive on Arbitrum.
Step 4: Confirm the Transaction
Review the transaction details, including any fees. Once you are happy with everything, confirm the transfer in MetaMask. Your transaction will be sent over to Arbitrum.
Step 5: Track the Transfer
After your transfer is completed, you can use Arbitrum Scan to check the status of your transaction. Once it is confirmed, you should see your tokens in your Arbitrum wallet, ready to use.
Withdraw ETH or ERC-20 Tokens
Now that we have learned how to transfer your assets through different bridges, what if you want to transfer your funds back to the parent chain? Do not worry. It is as easy as depositing.
First, log in to Arbitrum Bridge using your wallet. Make sure your wallet is connected to the source network. Then, select the page where you want to move your assets.
Once there, select the token you want to bridge. You can manage your token list, too. Now enter the amount of ETH or ERC-20 tokens. The next step is to click “Move funds.” You will see a countdown telling you that you will get your funds in 7 to 8 days. This is the standard period for the Arbitrum withdrawal challenge.
If you do not want to wait that long, third-party fast bridges like Across Protocol, Stargate, or Hop Protocol can bridge from Arbitrum back to Ethereum in just a few minutes at the cost of a small fee. This is a great option for users who need quick access to their funds.
Once the countdown is done, switch your wallet to the destination network and claim your assets. You can check your transaction status at any point through Arbitrum Scan.
Common Mistakes to Avoid When Adding Money to MetaMask and Bridging to Arbitrum
Even careful users can make costly errors during this process. Here are four common mistakes to watch out for:
- Copying only part of your wallet address when transferring from an exchange can result in funds being sent to the wrong wallet and lost permanently. Always copy the full address and double-check it before confirming.
- Choosing the wrong network when withdrawing from an exchange is a very common mistake. Sending Ethereum mainnet ETH when you meant to send Arbitrum ETH can cause delays or even fund loss, depending on the platform. Always confirm the network before hitting send.
- Ignoring gas fee spikes during high network congestion can lead to approving transactions that cost more than the amount you are actually transferring. Always check current gas prices before initiating a swap.
- Storing your 12-word recovery phrase digitally in screenshots or cloud notes makes it accessible to anyone who gains access to those accounts. Always write it down on paper and keep it somewhere offline and secure.
Conclusion
And there you have it! You have now learned how to add money to MetaMask and set it up to use Arbitrum. You get to enjoy the benefits of faster and cheaper transactions with Arbitrum while still being able to interact with the Ethereum network. It is a fantastic tool to help you get the most out of your crypto experience, whether you are trading, investing, or exploring new apps.
Now you can move ETH or any other token to Arbitrum. You just need to connect your MetaMask wallet, select the bridge and network, and confirm the transfer. That is it. You can now proceed! Plus, with the help of tools like Arbitrum Scan, you can track your transactions every step of the way.
If you are looking to save on gas fees and get faster transactions, bridging to Arbitrum is a wise choice. The more you use it, the more you will see why Arbitrum is quickly becoming one of the most popular Layer 2 networks in the Ethereum ecosystem.
Now that you have got the basics down, you can use MetaMask and Arbitrum to maximize your crypto journey. It is all about learning at your pace. So take it step by step and enjoy the process!
Frequently Asked Questions
1. What is MetaMask?
MetaMask is a popular software wallet that allows users to store and manage cryptocurrencies like Ethereum and ERC-20 tokens. It lets you interact with decentralized applications (dApps) directly from your browser or mobile device.
2. How do I add funds to my MetaMask wallet?
You can add funds to MetaMask in several ways:
- Buy directly within MetaMask: Use trusted third-party services like MoonPay, Transak, or Banxa to purchase Ethereum or other cryptocurrencies straight in the app using a debit or credit card.
- Transfer from another wallet or exchange: Copy your MetaMask wallet address and use it to withdraw funds from other wallets or exchanges.
- Withdraw from an exchange: Transfer your crypto from exchanges like Coinbase, Binance, or Kraken to your MetaMask wallet.
3. What is Arbitrum, and why should I use it?
Arbitrum is a Layer 2 scaling solution built on top of Ethereum. It offers faster and cheaper transactions while maintaining the security of the Ethereum network. Arbitrum is ideal for users who want to avoid high gas fees and slow processing times on Ethereum.
4. Can I move my funds back to Ethereum after using Arbitrum?
Yes, you can use the Arbitrum Bridge to move assets back from Arbitrum to Ethereum. Log into the Arbitrum Bridge, select the token and amount, and confirm the transfer. The standard withdrawal takes 7 to 8 days due to Arbitrum’s challenge period. If you need faster access to your funds, third-party bridges like Across Protocol or Stargate can complete the transfer in minutes for a small additional fee.